After photocopying my images and printing them using cellulose thinners I scanned the prints into Photoshop. I changed the levels to bring the differences in tone out more in the image. I then scanned in a piece of sugar paper and used the hue and saturation tool to change the colour, saturation and brightness. I then placed this in a layer underneath each of the prints in their separate Photoshop documents and then multiplying the prints to allow the texture to come through on the lighter parts of the image.
I used Quick Time to save my .amr audio file in the.mp3 format so that I would be able to use it in Final cut pro.
To import the audio tracks to the time line I set the in and out points in the viewer and then inserted the section.
I adjusted the volumes of all the audio tracks so that the speech could be heard clearly along with the music. To do this I used the audio mixer tool.
I added the cross dissolve video transition to the changes between pictures. This communicates the character fading away until he kills himself at the end. It generally adds to the lonely and sad feel of the piece as the transition is often used when showing pictured of people who have died.
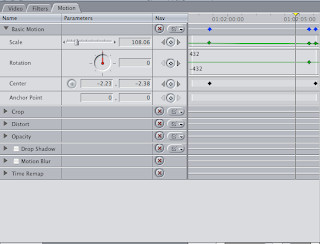
As I was creating the video I realised that some of the images were lasting too long to hold the viewers attention. To combat this I turned on the wire-frame in Final Cut Pro to allow me to change the size of the images. I then cut the length of the photo and made the second part zoom in to a smaller part of the image. This helps to keep the viewers attention through the piece.

I used the tint filter and used key-frames to set the colour changes, and fade between these, to edit the images within Final Cut Pro. However I didn't like this effect. I felt that the video was more effect without the colour change, for communicating sadness and loneliness.


0 comments:
Post a Comment